As many of my friends and colleagues will know, I am a big fan of Smart Home/IOT technology – plugs, lights, sensors, cameras… I like automating things around the house – partly for security reasons, partly for reasons of making my life easier, but mostly because I enjoy working with technology! 🙂
However, I am well aware of the security implications of Smart Technology – and in particular the risks associated with placing devices onto a home network, where devices with personal information are regularly used.
In this post I’ll give an overview of how I am securing my network – with minimal effort… (All of this can be configured in under 10 minutes)
I’m using the awesome Ubiquiti Unifi nanoHD APs:

Ubiquiti equipment and software is AWESOME, especially if you want effective and easy to use control over your network, without having to use complex configuration scripts or a confusing GUI. There are a few things you can do to secure Smart Technology items, and also to create a secure environment for Guest Users, Children, and anyone/anything else you may wish to restrict in some way. The key features that help here are:
- Separate Wireless Networks – I have a Wireless Network setup for my own devices, another for Smart Tech items, and another for Guest Users – these are best off separated and kept apart! (These are all broadcast from the same AP too – with no need for extra hardware)
- Time based Wireless Network access – this is more for those with children, whereby you can have a Wireless Network that is available only between certain times.
- Throughput Control – this allows a Network to be restricted to a specified total bandwidth throughput. Useful for ensuring one device/user/network does not overload your internet connection
- IP range restrictions – this allows devices on specific Networks to be restricted when trying to access certain IP ranges or addresses. This is great for Guest networks – and can be used to ensure those Guest users can only access the internet for example. Many Smart Tech devices also require only internet access, with no need for them to communicate with other items on your network.
Configuration of all of the above is extremely simply using the Ubiquiti Controller – I’m running this on my own server, but the Cloud Keys are worth a look if you don’t have this option or want a dedicated device. Thankfully all of the above is just a few clicks in the Controller interface too – no need for any configuration, cabling, or code!
Separate SSIDs
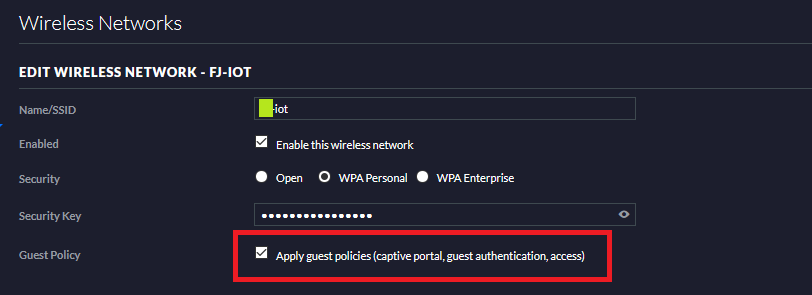
This is very easy to setup – from the settings interface, browse to Wifi Networks, and then create the networks you require:

Ensure that for any IOT or Guest Networks you mark these as Guest Networks – as the security restrictions (IP based) then apply:
Time based SSID access
Again, this is a breeze to setup – on the SSID you want to restrict select, Edit (shown below):

You can then control the time on a schedule:

This setting is probably more for those with children who’s access they are trying to limit – unless you have devices you don’t want online at certain times.
Throughput Control
Throughput control is based on creating User Groups – with a throughput limit assigned to the Group. I have the following Groups setup:
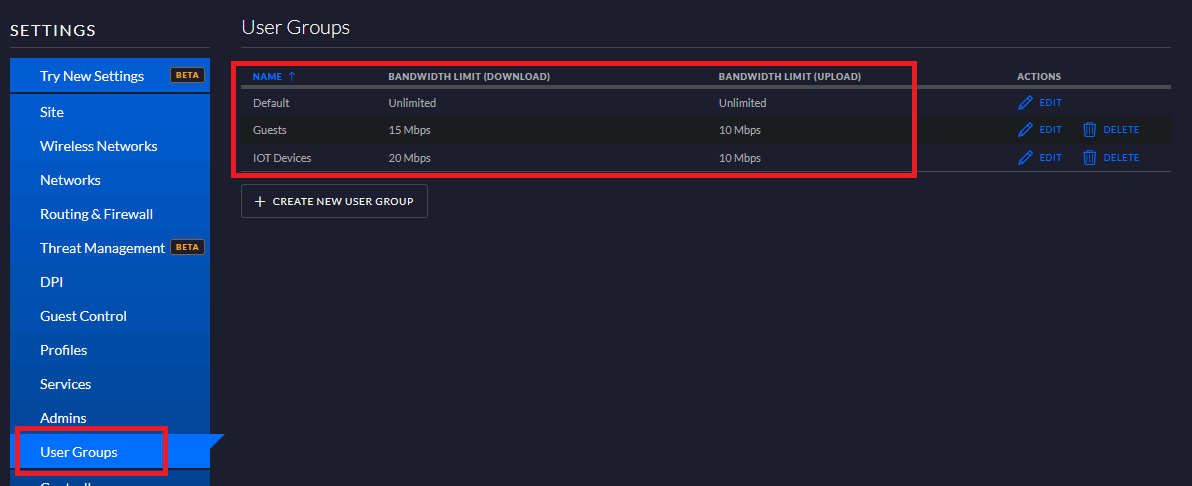
Personally I think I am quite generous with my Guest users…

Next – we need to associate the Groups with a Wireless Network, so that the bandwidth restrictions are applied to that Network. To do this, go back and edit the Wireless Network:
Within the User Group section – select the required Group:
![]()
Now your Wireless Network has a configured throughput limit!
IP Restrictions
These are also very easy to setup, browse to the Guest Control section of the Settings Menu – and then add any IP ranges or addresses you want to prevent Guest Users (any Wireless Network marked as Guest) accessing:

I’ve left this default – any private address is restricted – so my Guest Users and IOT Devices can only access the internet, and are prevented from accessing anything else on my networks.
Hope this helps – until next time!