Recently, I have been playing around more and more with Microsoft Flow – which is a tool designed to Automate processes and tasks. In a previous post I used a tool called Stringify to automate a number of Smart Home actions. Microsoft Flow provides a similar environment and allows integration between processes and tasks.
I was impressed from the first time I played with Microsoft Flow at how powerful the tool could be – and immediately set to work creating a simple flow, which I am going to demonstrate here.
Onboarding a new Azure AD User, by filling in a simple online form – the Flow will:
- Create the AD User Account based on the username we specify
- Set the users password based on a password we specify
- Add the user to either the “Staff” or “Student” Department
- Send an email notification with the account details ready for use
The key here is that this process can now be carried out, with commonality and uniformity, by someone with no technical knowledge of Azure AD at all.
To start this process – we need a Form. I’ve created a simple form in Microsoft Forms to capture all of the information above, to integrate this into Microsoff Flow. Creating forms is super simple in Microsoft Forms – I’ve created a basic new user data gathering form for our Flow below:

Now – when this form is filled in, we have the information captured that we will need for our Flow. The next step is to start building the Flow. To do this, log into Microsoft Flow and click on “Flows” and then “Create from Blank”:

Next up, we need to add a Trigger – this is an event that will cause our Flow to run. In our case – it will be when a new submission to our Form is received. Just search for Forms and then you’ll see the options required:
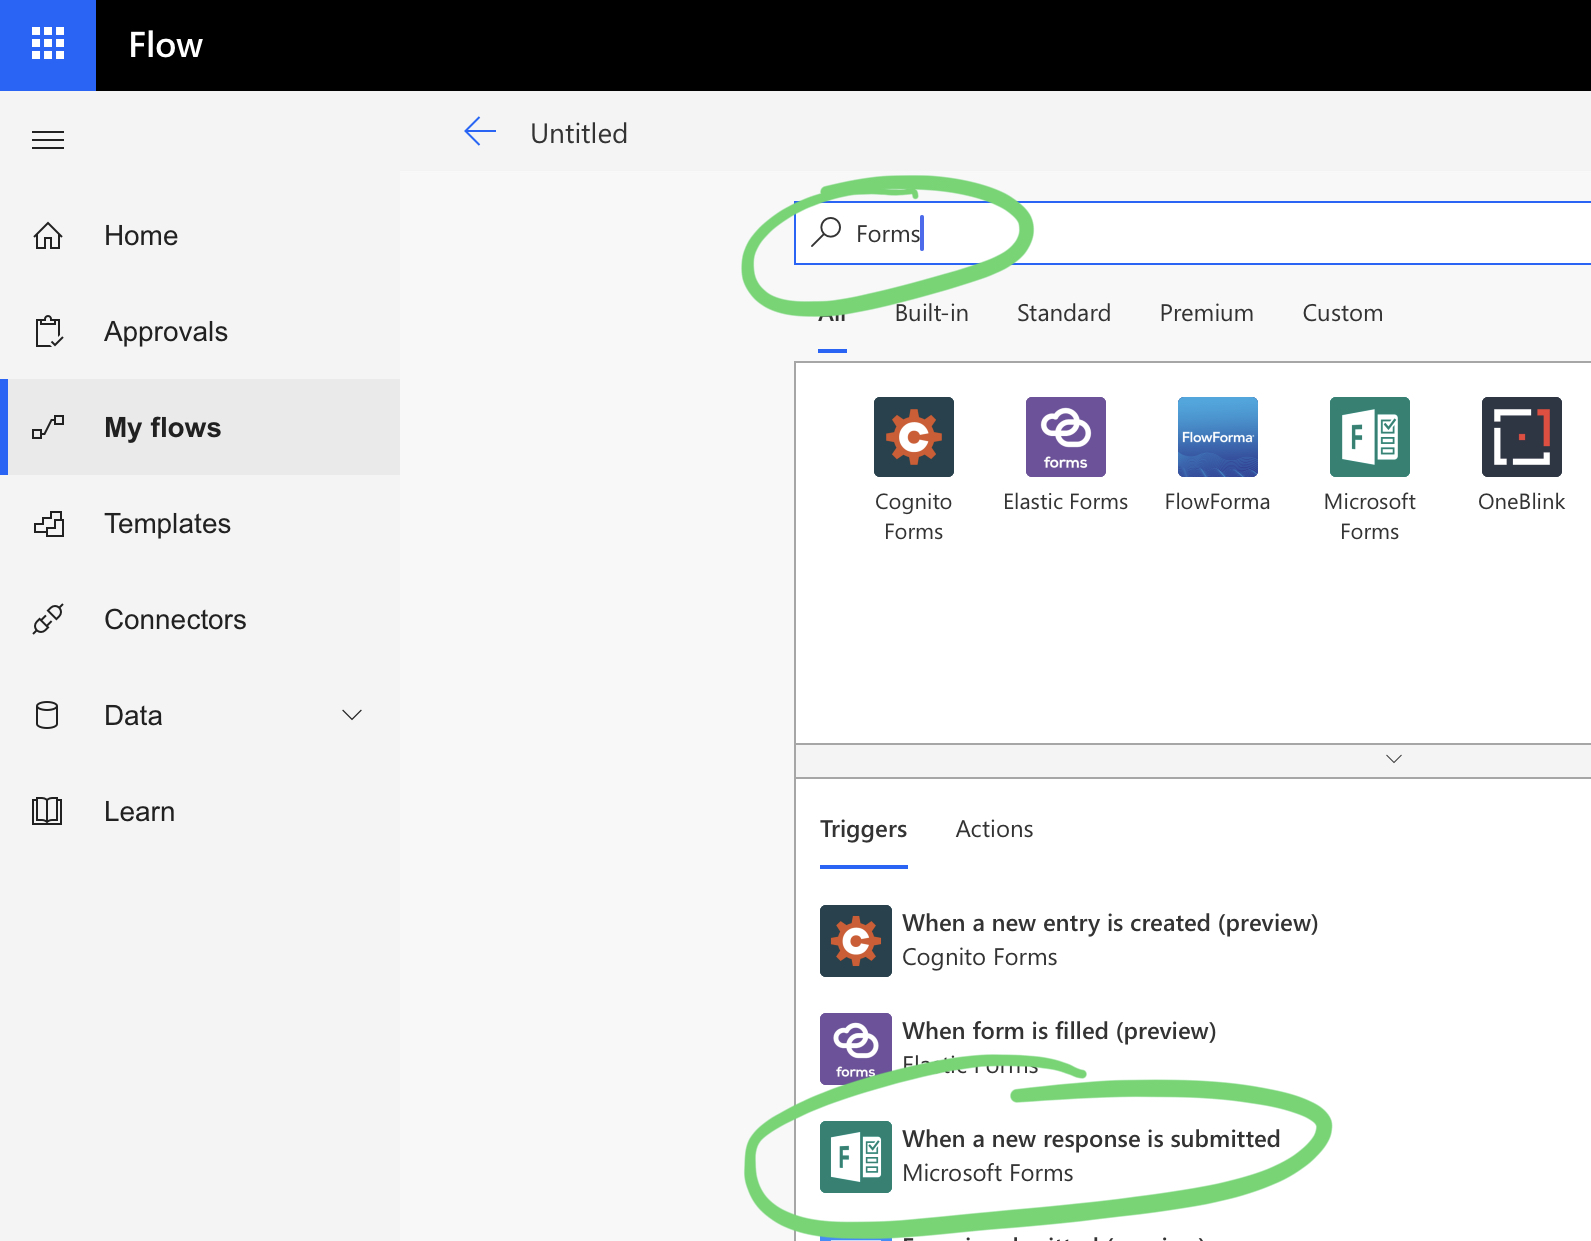
When we have selected “When a new response is submitted”, we then see the first step in our Flow has been added:

We need to tell Flow which Form to use now – because I am signed into my Microsoft Account, any forms I have in my account are shown in the drop down list:

Now we have our trigger, we need an action to follow – in this case, we need to get the Form response details. Do do this, just click on “New Step” (shown above) and then search for Forms:

You’ll see now that we need to select our Form again, so that the correct Form is associated with this step in the Flow:

When we add this Form you’ll notice we also have to specify a “Response Id”. In our case, this needs to be Dynamic Content – so that each response is processed by our Flow. When we click into the Response Id area – a new Window will open where we can select Dynamic Content, and then click “See more” – we can then select “List of response notifications…”:

Upon selecting this – Flow will recognize that we want to carry out an action for each response we get – and an “Apply to each” section will be automatically created:

Now we can start creating the Azure AD elements of our Flow, to do this, click on “Add an action” above, and then search for “Azure AD” – we will start by creating the user:

Once this element has been added we can start adding Dynamic Content from our Form to the new user section of the Flow – you’ll notice that when you click into areas that support Dynamic Content, the Dynamic Content window will show as below:

Once completed, we have the following in place for our user creation step:

Next I am going to configure a simple email notification – to let me know what’s been created. We can do this with the “Add an action” option, and then search for “email”:

We can then use Dynamic Content, as we did before, to create an email based on the response to our Form:

Important: Obviously using this method is bad security practice (username and password in the same email) – and in this case is used just to give an idea of the capabilities of the Flow. In production use, using something like the Office 365 “Send an Email” is better – as this supports sending to different addresses, so for example, the username and password can be sent to different lists or addresses. For example, the username to the new user, and the password to the manager (without the username).
Finally – we can test our Flow. To do this, it’s just a case of filling in the Form created earlier:

We can check that our Flow has run from the Flow web interface:

And also – drill down into exactly what was run by clicking on the “Succeeded” (or Failed) in Run History – below you can see some of the variables my Form data contained:

The next step is to check that an Azure AD user has actually been created:![]()
Bingo – everything looking good here… and below we have the user with the details from our Form correctly filled in:

Finally – we can check to confirm we have been emailed the confirmation message with the details of the user account:

As you can see – the Flow has worked as expected, and we now have an Azure AD Account and email notification to go with it. Whilst this is really just scratching the surface of what we can do here – it gives an idea of where we could take this type of automation. A few things I can immediately think of for this type of new user scenario:
- Add to numerous AD Groups – based on checkboxes in a form
- Create an O365 Mailbox – based on username/names
- Provide a welcome email to the mailbox
- Notify a Slack or Teams channel that a new user has been created, for example “Please welcome [Username] to the department!”
- Interact with one of the many 3rd party systems supported in Flow – for example adding the user to a CRM system, or SAAS application
Hopefully this has been interesting – and congrats for making it to the end of this post!